
Commands (often called “slash commands”) are a great way to adjust settings in your world. While many options are also available through various menus (including the Classroom Mode interface), there are certain settings only accessible through these commands. In this article, you’ll learn how commands are set up through common variables like targeting and coordinates, and we will even go through a few essential commands to get you started.
How to Use
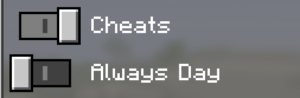
Commands, also referred to as “Slash Commands”, are entered via Minecraft’s chat window, which is displayed by pressing the T key (default), enter key, or / key. Slash Command entry features a predictive text system that helps players find and use commands from the list. To use most Commands in game, Activate Cheats must be enabled from the Game Settings menu.
(tab)
Using this while typing a command will auto-complete that command or arguments for it.
/
Using the / key will also enter the forward slash that commands require as a prefix into the chat window, so it is a useful shortcut.
↑ and ↓
The arrow keys enter the previously executed command.
Tab ↹
This cycles through possible commands or arguments, and can be used to auto-enter the coordinates of the block looked at before entering chat.
Targeting
In most commands where a player may be specified as an argument, it is possible to “target” one or more players instead of specifying players by name. For example, the teleport command has options for not just destination, but other players, and rotation coordinates.
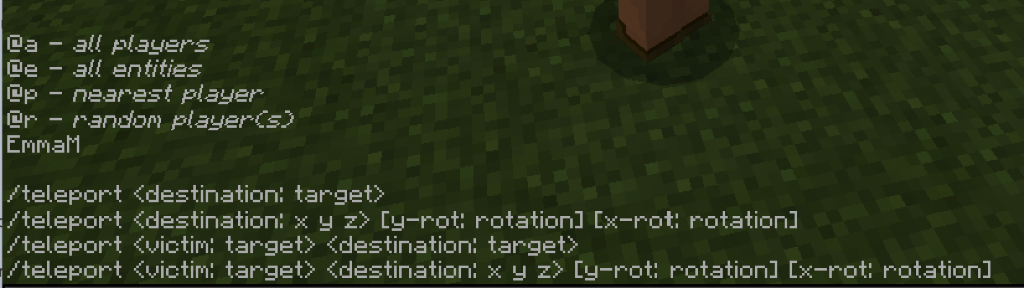
@a
All players
@e
All entities
@p
Nearest player
@r
Random player(s) (a list will appear below of players currently in the world)
@s
Yourself
Coordinates
- Commands recognize two types of locations, true location, and relative location.
True coordinates correspond to the unique location of a spot in game (the map shows your character’s true coordinate).
- Relative coordinates correspond to (x, y, z) distances from the location of the in-game character, and are represented using the tilde sign (~).
When you load into the game, you do not automatically start at 0,0,0. The easiest way to see the location where you are is to use Show Coordinates. (Remember: Cheats must be turned on to use this option.)
With regards to coordinates, rotation is optional, so we will cover it in a “Commands In Depth” section (currently unavailable, but coming soon).
You can also use negative values for tildes and relative coordinates. Feel free to experiment!
Customizing worlds with commands
You can customize the world and in some cases, alter the individual experience within it for your users. While you can select these options as you are creating the world, you can also change those options once you are in the world.
/difficulty
Syntax: /difficulty (string)
This is what it looks like in the game settings menu.
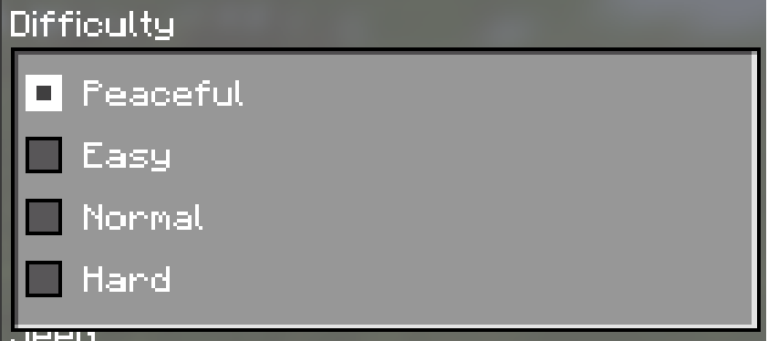
Key
e
Hostile mobs are allowed to spawn, and as the name suggests, provide less damage than on
h
Hostile mobs are allowed to spawn, and as the name suggests, provide more damage than on
n
Hostile mobs can spawn, but deal standard damage levels.
p
Hostile mobs do not spawn naturally, and they do not deal damage.
Unlike Creative or Survival mode, you cannot set this per player.
/immutableworld
Syntax: /immutableworld (value)
Immutable world works just like Adventure mode in other editions of Minecraft, but is exclusive to Education Edition. It must be set by an operator of the world, and cannot be set per player. Adventure mode lets you interact with blocks but not destroy them.
/gamemode
Syntax: /gamemode (string) (target)
This adjusts the same game setting as this option in the game settings menu.
Mode
Creative (c): Creative mode removes the survival elements and allows players to easily create and destroy structures and mechanisms. Unlimited building materials are provided
Survival (s): In this mode, players have to gather all their materials to build, craft, and gain experience points.
By using the menu option, it will set the option for the entire world. By using commands in the world, you can set game mode per player.
/gamerule (allowdestructiveobjects, allowmobs, globalmute options)
Syntax: /gamerule (string) (value)
- allowdestructiveobjects – When set to true, players may use TNT near others. You may also use specialty blocks (allow, deny, border) to help limit potential damage.
- allowmobs – Mobs are living, moving creatures found within the Minecraft world. Friendly (creatures like chickens and ocelots) and not so friendly mobs (creatures like creepers) are allowed to appear in the world when this is turned on.
- globalmute – Disables chat for all players when set to true, otherwise players in your world can communicate with each other within the world they are in via the client. Chatting is on by default.
You can also set these via the Classroom Mode interface.
Exclusive Commands for Education
Typing /help will bring up a full list of current commands available in Minecraft: Education Edition. Here are specific commands that are either unique to or may work differently in Minecraft: Education Edition.
/ability
Syntax: /ability (target) (ability) (true or false)
- mayfly – This allows players to fly around the world, or be limited to ground travel only.
- mute – If you want to prevent a target from talking, you can set this ability to true. The user(s) will see the message “chat has been disabled”.
- worldbuilder – You can control who is allowed to build and change the world with this command. Read more about this command here. (You can also use /wb or /worldbuilder for this.)
/classroommode
/code
These two commands will attempt to launch and connect you to Classroom Mode and Code Connection, provided you have them installed, of course. As there are no additional arguments needed, just enter the above command and press return.
If you do not have the required application installed, you will see an error window similar to this (macOS version is displayed for reference):
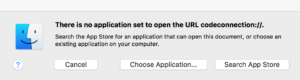
To resolve, download the needed application, install, and try again.
